

Does your car’s nighttime vision look a little foggy? Those hazy, yellowed headlights aren’t just ugly; they make driving at night much harder and less safe. It’s frustrating when you can barely see the road ahead, and you know your car can do better. Picking the right sanding kit to fix them can feel like a puzzle. There are so many different kits out there, and it’s tough to know which one will actually work and not just waste your money.
But don’t worry! We’re here to clear things up, just like we’ll help clear up your headlights. In this post, we’ll guide you through everything you need to know about choosing a sanding kit for your auto headlights. You’ll learn what makes a good kit, what to look for, and how to avoid common mistakes. By the end, you’ll feel confident picking the perfect kit to bring your headlights back to their shiny, clear best, making your drives safer and your car look great again.
Our Top 5 Sanding Kit For Auto Headlights Recommendations at a Glance
Top 5 Sanding Kit For Auto Headlights Detailed Reviews
1. 3M Ultra Headlight Restoration Kit

Rating: 9.1/10
Foggy headlights can make driving at night dangerous. The 3M Ultra Headlight Restoration Kit (39195) helps you bring back the clear shine to your car’s plastic lenses. This kit has everything you need to tackle yellowing and buildup on headlights, taillights, fog lights, and more. It’s designed for an easy, heavy-duty restoration.
What We Like:
- Complete kit includes everything needed: masking tape, various grit sanding discs (500, 800, and 3000 grit), a disc pad holder, and headlight clear coat.
- Uses 3M’s special abrasive technology to remove haze and damage without harming the plastic.
- Simple to use, with options for no tools required or compatible with a standard household drill for faster results.
- Restores plastic lenses like headlights, taillights, fog lights, and directional lights.
- Comes with a wax protectant to keep your lenses looking clear longer.
What Could Be Improved:
- The 3-inch discs might feel small for very large headlight lenses, potentially requiring more passes.
- While it says “easy,” the process involves several steps that require careful attention to detail for best results.
This 3M kit offers a straightforward way to improve your car’s appearance and safety. With its comprehensive set of tools and materials, you can achieve a professional-looking headlight restoration right at home.
2. 86PCS Car Headlight Polishing Kit
Rating: 8.6/10
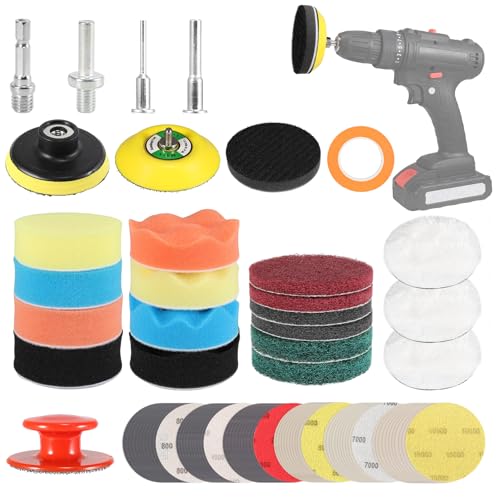
Tired of hazy, yellow headlights that make your car look old and unsafe? The 86PCS Car Headlight Polishing Kit is here to help! This all-in-one kit lets you restore your car’s headlights to their former glory using just your household drill. It’s a physical repair, meaning no harsh chemicals are needed, making it safe for you and the environment. This kit is perfect for headlights, taillights, fog lights, and more.
What We Like:
- Versatile Conversion: The included backing pads let you use your regular drills and grinders as polishers.
- Chemical-Free Restoration: It only needs water for a safe and eco-friendly repair.
- Comprehensive Set: With 86 pieces, it includes everything from sandpaper and polishing pads to masking tape and a handle.
- Effective Sanding: The kit offers both dry sanding for quick fixes and wet sanding for a smooth, high-quality finish.
- Easy 5-Step Process: The kit guides you through a simple 5-step process for a professional result.
What Could Be Improved:
- Instruction Clarity: While a manual is mentioned, some users might prefer more detailed visual guides or video links for the 5-step process.
This headlight polishing kit offers a practical and effective way to refresh your car’s appearance and improve visibility. It’s a smart investment for any car owner looking to do their own maintenance.
3. CERAKOTE® Ceramic Headlight Restoration Kit – Guaranteed To Last As Long As You Own Your Vehicle – Brings Headlights Back to Like New Condition – No Power Tools Required – 10 Wipe Kit

Rating: 8.7/10
Tired of hazy, yellow headlights that make your car look old and reduce visibility? The CERAKOTE® Ceramic Headlight Restoration Kit is your solution. This kit promises to bring your headlights back to that crystal-clear, like-new condition, and the best part is, it’s built to last as long as you own your vehicle. You won’t need any fancy power tools, making this a simple DIY project for anyone.
What We Like:
- This kit lasts as long as you own your vehicle! It uses a ceramic coating that bonds to your headlights and protects them from UV rays.
- No power tools are needed. Everything you need is in the kit, so you don’t have to worry about damaging your car.
- It restores and protects from UV rays. The ceramic coating creates a strong barrier against sun damage.
- It’s a simple 3-step process that takes about 30 minutes. Step 1 removes oxidation, Step 2 sands away tough spots, and Step 3 applies the ceramic coating.
- Cerakote is a trusted name. They are known worldwide for their advanced ceramic technology, used by top aerospace and automotive companies.
What Could Be Improved:
- The kit contains 8 Step 1 wipes, 1 Step 2 sanding kit, and 2 Step 3 ceramic coating wipes. While this covers the basic steps, some users might wish for more Step 1 or Step 3 wipes in case of unexpected issues or for larger vehicles.
- The sanding kit is included, which is great, but it’s a single item. Users may need to purchase additional sanding materials if their headlights have very deep damage.
This CERAKOTE® kit offers a long-lasting, easy-to-use solution for dull headlights. It’s a smart choice for anyone looking to improve their car’s appearance and safety.
4. 133 PCS Sanding Disc Drill Polishing Kit Sanding Attachment

Rating: 9.2/10
This 133-piece sanding and polishing kit is a versatile tool for anyone looking to restore, refine, or finish various surfaces. With a wide range of grit levels and attachments, it makes tackling everything from car headlights to wooden furniture a breeze. The kit includes everything you need to go from rough sanding to a mirror-smooth shine.
What We Like:
- Offers a complete set of grits, from coarse 60 to ultra-fine 10000, for all your sanding needs.
- Works for both wet and dry sanding, giving you flexibility for different jobs.
- Includes buffing pads and a wool pad for polishing, so you can achieve a professional finish.
- The hook and loop system makes changing discs quick and easy.
- It’s designed for use with drills, making it convenient for DIYers.
- The washable and reusable pads save you money in the long run.
- Works well on many materials like cars, wood, metal, glass, and resin.
What Could Be Improved:
- Some users might find the 3-inch size a bit small for very large projects.
- While durable, the attachments could potentially wear out with extremely heavy or prolonged use.
This kit simplifies polishing tasks for both beginners and experienced users. It’s a fantastic value for the variety of applications it covers.
5. 3M Auto Restore and Protect Headlight Restoration Kit

Rating: 9.1/10
Foggy headlights can make your car look old and can even be dangerous. The 3M Auto Restore and Protect Headlight Restoration Kit is a simple way to fix that. This kit cleans and protects the plastic lenses on your car, like headlights, taillights, and fog lights. It uses special sanding discs to gently remove cloudy buildup without scratching the plastic. The kit also includes a clear coat to keep them looking new. You can save a lot of money compared to buying new headlight parts.
What We Like:
- It easily removes yellowing and cloudiness from plastic lenses.
- The kit includes everything you need: sanding discs, clear coat wipes, a foam pad, and a glove.
- It works on headlights, taillights, fog lights, and other plastic lights on your car.
- You can use it by hand, or with a regular drill for faster results.
- It helps you save money because you don’t have to buy new headlight assemblies.
- The 3M Trizact technology is gentle and won’t damage the plastic.
What Could Be Improved:
- The kit only comes with two sanding discs, so you might need more for very damaged headlights.
- The clear coat wipes might require a steady hand to apply evenly.
This 3M kit is a fantastic DIY solution for restoring your car’s lights. It’s easy to use and delivers great results, making your car look better and safer to drive.
Brighten Your Ride: Your Guide to Sanding Kits for Auto Headlights
Cloudy, yellowed headlights can make your car look old and hurt your nighttime driving visibility. A good sanding kit can bring them back to life! This guide will help you choose the right kit to restore your headlights.
What to Look For in a Sanding Kit
Key Features to Look For
- Multiple Grit Sandpapers: This is super important. You need a range of grits, from coarse (like 800 or 1000) to very fine (like 2000 or 3000). The coarse grits remove the damaged layer, and the finer grits polish them smooth.
- Polishing Compound: After sanding, your headlights will look foggy. A polishing compound buffs them out and makes them crystal clear again.
- Sealing/Protectant: The plastic on your headlights is exposed after sanding. A sealant protects them from UV rays and keeps them clear longer.
- Applicator Pads/Sponges: These help you apply the polishing compound and sealant evenly.
- Masking Tape: You’ll need this to protect your car’s paint around the headlights.
- Instructions: Clear, step-by-step instructions are a lifesaver, especially if you’re new to this.
Important Materials
Most headlight sanding kits use waterproof sandpaper. This type of sandpaper works well with water, which helps to keep the sandpaper from clogging and makes the sanding process smoother. The polishing compounds are usually a type of abrasive paste. The sealants are often acrylic or urethane-based to create a durable, protective layer.
Quality Matters: What Makes a Kit Good or Bad?
Factors That Improve Quality
- High-Quality Sandpaper: Sandpaper that doesn’t break down easily and has consistent grit size will give you a better finish.
- Effective Polishing Compound: A compound that quickly removes sanding marks and creates a smooth surface is key.
- Durable Sealant: A good sealant will last a long time, protecting your headlights from sun damage and yellowing.
- Complete Kit: A kit that includes everything you need means you won’t have to run to the store for extra supplies.
Factors That Reduce Quality
- Low-Quality Sandpaper: Sandpaper that wears out fast or has uneven grit can scratch your headlights badly.
- Weak Polishing Compound: A compound that doesn’t polish well will leave your headlights looking dull.
- Temporary Sealant: Some kits have sealants that wash off quickly or don’t offer much protection.
- Missing Items: If a kit doesn’t have tape or a sealant, it’s less useful.
Putting It to Use: User Experience and When to Use It
User Experience
Most users find that using a sanding kit is a rewarding DIY project. It takes some patience and elbow grease, but the results are usually dramatic. Many kits are designed for easy use, even for beginners. Following the instructions carefully is the best way to get a great outcome. You might need to apply some pressure, but avoid pressing too hard, which can damage the plastic.
Use Cases
You’ll want to use a sanding kit whenever your headlights start to look:
- Yellowed
- Cloudy
- Hazy
- Scratched
This improves your car’s appearance and, more importantly, makes driving at night much safer by allowing more light to shine through.
Investing in a good sanding kit can save you money compared to buying new headlights. It’s a practical way to maintain your vehicle.
Frequently Asked Questions (FAQ)
Q: How long does it take to restore headlights with a kit?
A: It usually takes about 30 minutes to an hour per headlight, depending on how bad they are and your speed.
Q: Do I need any special tools?
A: Most kits come with everything you need. You might want to have a small bucket of water and some towels handy.
Q: Will sanding damage my headlights?
A: If you follow the instructions and use the grits in order, sanding won’t damage your headlights. It actually restores them.
Q: How long do the results last?
A: With a good sealant, the clarity can last anywhere from six months to a couple of years. Reapplying the sealant might be needed.
Q: Can I use this on plastic taillights?
A: Yes, many kits can be used on taillights too, but always check the kit’s instructions first.
Q: What if my headlights are badly cracked?
A: Sanding kits are best for haziness and light scratches. Deep cracks usually mean you need new headlights.
Q: Do I need to wet sand?
A: Most kits include waterproof sandpaper, which is meant to be used wet. This helps with a smoother finish.
Q: How often should I re-sand my headlights?
A: You don’t need to re-sand often. Only do it when they start to look hazy or yellow again.
Q: Can I paint my headlights after sanding?
A: These kits are for restoring clarity, not for painting. Painting headlights is a different process.
Q: What’s the difference between polishing and sealing?
A: Polishing removes haze and scratches to make them clear. Sealing protects that new clarity from the sun and weather.
In conclusion, every product has unique features and benefits. We hope this review helps you decide if it meets your needs. An informed choice ensures the best experience.
If you have any questions or feedback, please share them in the comments. Your input helps everyone. Thank you for reading.