
What is lawn striping? Lawn striping is the art of creating alternating light and dark bands on your grass. This visual effect makes your lawn look like a professional sports field. Can I achieve this look at home? Yes, you absolutely can! Many homeowners want to know how to achieve lawn stripes. This guide will walk you through everything you need to know for stunning DIY lawn stripes.
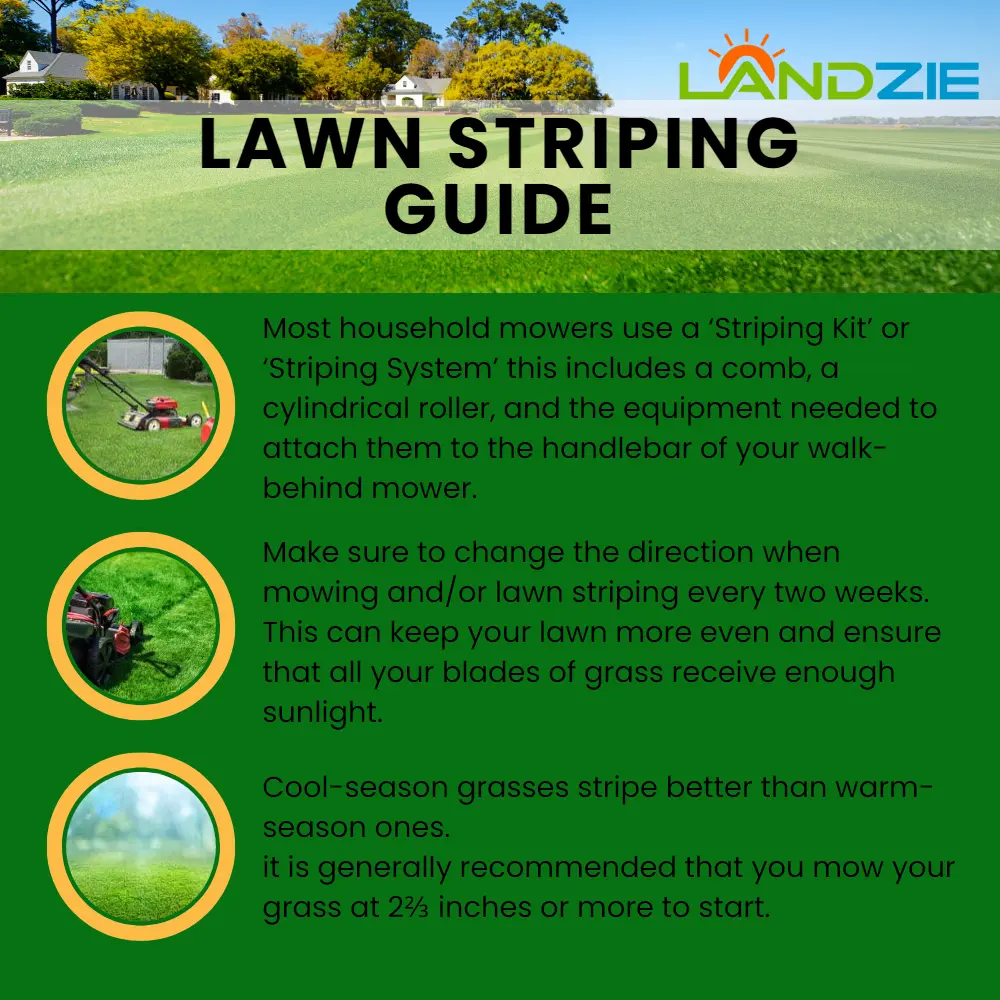
Image Source: landzie.com
The Magic Behind Lawn Striping Patterns
Ever wonder how golf courses and baseball fields get those perfect stripes? It’s all about light reflection. When you mow your lawn in a specific way, you’re actually bending the grass blades.
- Light Colors: Grass blades bent away from you reflect more light. This makes them appear lighter.
- Dark Colors: Grass blades bent towards you reflect less light. This makes them appear darker.
By alternating the direction of your mowing, you create these distinct light and dark stripes, a process known as making lawn stripes. The key is consistency and the right tools.
Essential Tools for Creating Lawn Stripes
To get that professional lawn striping look, you’ll need a few key pieces of equipment.
The Best Lawn Mower for Stripes
Not all lawn mowers are created equal when it comes to striping. For the best results, consider these features:
- Roller Attachment: Many high-quality mowers come with a rear roller, or have one as an optional attachment. This is the most crucial component for bending grass blades.
- Sturdy Deck: A well-built mower deck helps distribute weight evenly, contributing to a smoother mow and better striping.
- Good Maneuverability: You’ll be doing a lot of turning, so a mower that’s easy to handle will make the job much simpler.
Types of Mowers and Their Striping Capabilities:
| Mower Type | Striping Potential | Notes |
|---|---|---|
| Reel Mower | Excellent | Built-in rollers are standard. Offers the cleanest cut for striping. |
| Rotary Mower | Good to Very Good | Look for models with an integrated rear roller or available roller kit. |
| Riding Mower | Good | Requires a dedicated lawn roller attachment for best results. |
| Zero-Turn Mower | Good | Can achieve good stripes with a roller attachment, but turns can be sharp. |
| Robot Mower | Poor to Fair | Generally lack the ability to bend grass consistently enough for stripes. |
The Importance of a Lawn Roller for Stripes
A lawn roller is your secret weapon for creating sharp, defined stripes. It’s a heavy cylinder, usually filled with water or sand, that is pulled behind your mower or pushed independently.
- How it Works: As you roll, the weight of the roller presses down the grass blades. When combined with mowing, this creates that distinct bent-grass effect.
- Types of Rollers:
- Pull-Behind Rollers: These are towed by riding mowers or garden tractors. They cover a wide area quickly.
- Push Rollers: Smaller and lighter, these are suitable for push mowers and smaller lawns.
- In-Ground Rollers: Some mowers have a roller built directly into the mower deck, often at the rear. This is the most convenient option if your mower has one.
When to Use a Lawn Roller for Stripes:
- Before Striping: Rolling your lawn before mowing can help flatten any small bumps and create a more uniform surface for mowing.
- After Mowing: Many people attach a roller after mowing to set the bend in the grass blades.
- For New Seed/Sod: Rolling is also crucial for new lawns to ensure good seed-to-soil contact and firm up sod.
Other Helpful Lawn Care Striping Tools
- Sharp Mower Blades: Dull blades tear grass, leading to browning and poor striping. Always keep your blades sharp.
- Level Lawn: A smooth, level lawn is essential. Address any significant bumps or dips before you start striping.
- Consistent Mowing Height: Mowing at the correct height for your grass type is important for both health and striping.
How to Achieve Lawn Stripes: A Step-by-Step Guide
Now, let’s get to the fun part: making your lawn look like a masterpiece.
Step 1: Prepare Your Lawn
Before you even think about striping, ensure your lawn is ready.
- Mow Regularly: Keep your grass at a healthy height. Don’t cut too much off at once – no more than one-third of the blade length.
- Water Wisely: Water deeply and less frequently to encourage strong root growth.
- Fertilize: A well-fed lawn is a healthy lawn, which means better striping. Follow a proper fertilization schedule for your grass type.
- Weed Control: Weeds can detract from the clean lines of your stripes.
- Aerate: If your soil is compacted, aerating will help improve drainage and allow grass roots to grow deeper, leading to a more robust lawn.
- Dethatch: Excessive thatch can prevent your mower’s roller from effectively bending the grass blades.
Step 2: Choose Your Striping Pattern
There are many beautiful lawn striping patterns you can create. The most common are straight parallel lines.
- Straight Stripes: These are the classic look. You can go back and forth across your lawn or create diagonal patterns.
- Concentric Circles: These are more advanced and involve mowing in increasingly smaller or larger circles, often around a central point or obstacle.
- Diamonds or Checkerboards: These require precise turns and alternating mowing directions on adjacent strips.
For your first attempt at DIY lawn stripes, stick to simple straight lines.
Step 3: Mow for Stripes
This is where the magic happens.
- Start at an Edge: Begin mowing along one edge of your lawn. Mow in a straight line as perfectly as possible.
- Bend the Grass:
- Mow away from yourself (pushing the mower forward). This bends the grass blades away from you, reflecting light and appearing lighter.
- When you turn the mower around, mow towards yourself. This bends the grass blades towards you, reflecting less light and appearing darker.
- The Turn: This is critical for crisp lines.
- For Push Mowers: When you reach the end of a row, lift the mower deck slightly (if possible) and pivot the mower 180 degrees. Then, start the next row, overlapping slightly with the previous one.
- For Riding Mowers with Rollers: When you reach the end, lift the mower deck or engage the roller lift (if available). Make a wide, smooth turn, continuing your next pass so it is directly beside the previous one, maintaining the same stripe direction.
- Alternating Directions: Continue mowing back and forth, always bending the grass in opposite directions for each stripe.
- Work Methodically: Take your time. A steady, consistent pace is better than rushing.
- Consider the Sun: The angle of the sun can enhance or diminish the visibility of your stripes. Mowing when the sun is low in the sky (early morning or late afternoon) often provides the best contrast.
Step 4: Refine Your Stripes
Once you’ve mowed the entire lawn, you might notice some stripes aren’t as sharp as others.
- Re-Mow: You can go back and re-mow any stripes that need definition.
- Gentle Rolling: A light pass with a roller (without mowing) can sometimes help set the stripes further.
Advanced Striping Techniques
Once you’ve mastered the basics, you can explore more complex lawn care striping.
Vertical Mowing Stripes
Vertical mowing, also known as verticutting, involves using a machine with thin, sharp blades that spin vertically. This process cuts into the turf and thatch layer.
- Benefits: Vertical mowing can help remove thatch, improve air and water penetration, and encourage upright grass growth, which is excellent for striping.
- How it Helps Stripes: By removing lateral growth and encouraging vertical growth, verticutting makes the grass blades stand straighter and more uniformly, making them easier to bend for striping.
- When to Verticut: This is usually done a few times a year, often in the spring or fall, depending on your grass type. It’s a more intensive process than regular mowing. After verticutting, you’ll want to mow and potentially roll to establish your stripes.
Creating Lawn Stripes with Different Mower Types
- Push Mowers: You’ll need to be very diligent with your turns. A sharp 180-degree turn is key. If your mower is lightweight, you might consider adding a small roller to the front or rear if it doesn’t have one.
- Riding Mowers: These are generally easier for striping, especially if they have a built-in roller or you use a pull-behind roller. The wider cutting width means faster completion.
- Zero-Turn Mowers: While excellent for maneuverability, the quick, tight turns can sometimes disrupt the grass. Use a roller attachment and focus on smooth, wide turns to maintain crisp lines.
Troubleshooting Common Striping Problems
| Problem | Cause | Solution |
|---|---|---|
| Fuzzy or Weak Stripes | Dull mower blades; grass too tall; uneven lawn; not using a roller. | Sharpen blades; mow more frequently; level the lawn; use a lawn roller for stripes. |
| Uneven Stripe Width | Inconsistent turning; mower not aligned properly; uneven terrain. | Practice smooth, consistent turns; ensure mower is running straight; address lawn imperfections. |
| Stripe Color Isn’t Dark/Light Enough | Insufficient grass blade bend; not enough contrast in light reflection. | Ensure you are bending grass in opposite directions; try mowing when the sun is at a lower angle. |
| Damage to Lawn During Striping | Turning too sharply; mower deck too low; excessive roller weight for the grass type/condition. | Make wider, smoother turns; adjust mower deck height; use a lighter roller if grass is stressed or dry. |
Maintaining Your Striped Lawn
The beautiful stripes won’t last forever without a little upkeep.
- Regular Mowing: Continue mowing regularly in the same pattern. If you alternate directions each time you mow, your stripes will naturally reappear.
- Avoid Mowing in Wet Conditions: This can lead to ruts, damage to the grass, and poor striping.
- Periodic Rolling: You can re-roll your lawn periodically, especially after significant growth, to help maintain the crispness of the stripes.
Why Professional Lawn Striping is Different
While DIY lawn stripes can look fantastic, professional lawn striping often achieves an even higher level of perfection.
- Equipment: Professionals typically use high-end reel mowers with integrated, heavy-duty rollers. These machines are designed for optimal striping.
- Experience: They have years of experience and know-how regarding different grass types, soil conditions, and optimal mowing heights for striping.
- Consistency: Their methods ensure consistent, sharp, and uniform stripes across the entire lawn, every time.
- Maintenance: Professionals also include regular lawn maintenance like aeration, dethatching, and proper fertilization, which are all crucial for a healthy lawn that takes stripes well.
Frequently Asked Questions About Lawn Stripes
Q1: How often should I stripe my lawn?
You can stripe your lawn every time you mow, alternating the direction of your stripes with each mowing session. This helps maintain the look and encourages upright grass growth.
Q2: Can I stripe any type of grass?
While most grasses can be striped, some respond better than others. Cool-season grasses like Kentucky Bluegrass and Fine Fescues tend to show stripes more clearly because their blades are naturally more upright. Warm-season grasses can also be striped, but the effect might be less pronounced.
Q3: What’s the best time of day to stripe my lawn?
Early morning or late afternoon, when the sun is lower in the sky, often provides the best contrast for stripes. Avoid mowing in the middle of the hottest part of the day.
Q4: Do I need a special mower?
While specialized reel mowers are best, you can achieve good stripes with a quality rotary mower equipped with a rear roller or by using a separate lawn roller for stripes. The key is the ability to bend the grass blades consistently.
Q5: Will rolling my lawn damage it?
Rolling is generally safe for lawns when done correctly. Avoid rolling when the grass is too wet, as this can cause compaction and damage. Also, ensure your roller isn’t excessively heavy for your grass type or soil conditions.
Q6: How do I make my stripes really sharp?
Sharp mower blades are essential. Also, practice making your turns smooth and precise. Overlapping your mowing passes slightly can help ensure no grass is missed and the lines are clean. Using a roller immediately after mowing can help set the bend in the grass blades.
Q7: Can I stripe on a newly seeded or sodded lawn?
Yes, but with caution. Rolling is very beneficial for new lawns to ensure good seed-to-soil contact or to firm up sod. However, wait until the grass is established and at the appropriate height before attempting to stripe by bending the blades. For new lawns, focus on gentle rolling and mowing to height.
Q8: Is there a difference between mowing stripes and vertical mowing stripes?
Yes. Mowing stripes are achieved by bending grass blades with a mower’s roller. Vertical mowing stripes involve using a verticutter to cut the grass blades vertically first, encouraging upright growth, which then allows for more pronounced stripes when mowed and rolled.
By following these steps and tips, you can transform your lawn into a striped masterpiece, achieving that coveted professional lawn striping look right in your own backyard. Happy striping!