
Can you bring dead grass back to life? Yes, while completely dead grass cannot be revived, you can often revive dead grass that is dormant or severely stressed. If your lawn is suffering from brown spots, thinning, or bare patches, it might be salvageable with the right care. This guide will walk you through the essential steps to restore patchy lawn and green up yellow lawn, transforming it from dull and damaged to vibrant and healthy. We’ll cover how to treat brown spots, provide lawn care for dead patches, explain how to revive a dying lawn, help you improve dry lawn conditions, fix bare spots lawn, address lawn repair dead grass scenarios, and even how to resuscitate scorched lawn.
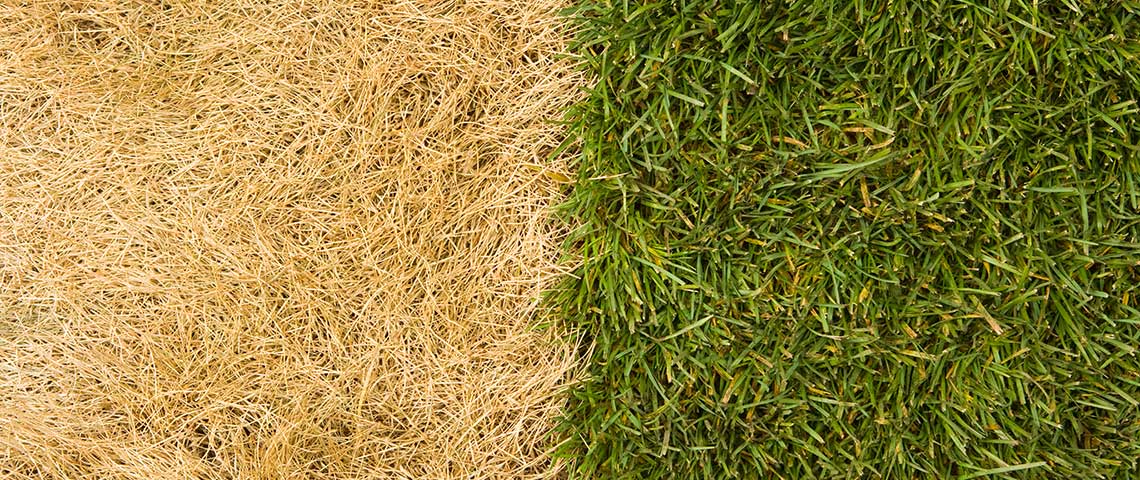
Image Source: www.pennington.com
Step 1: Assess the Damage and Identify the Cause
Before you can bring your lawn back to life, you need to figure out what’s wrong. A thorough inspection will tell you if your grass is just thirsty, lacking nutrients, or suffering from something more serious.
Diagnosing the Problem
Look closely at the affected areas.
- Is it truly dead, or just dormant? Dormant grass usually turns brown or yellow but will green up with water. Truly dead grass will be brittle and break easily.
- Are there distinct brown or dead patches? This could point to disease, insect activity, or localized stress like pet urine.
- Is the whole lawn a uniform dull or yellow color? This often indicates a lack of nutrients or general poor health.
- Is it dry and crunchy? This is a clear sign of drought stress.
- Are there signs of insects? Look for grubs, chinch bugs, or other pests by digging up small sections of turf.
- Are there signs of disease? Fungal diseases often appear as spots, rings, or fuzzy growth.
Common Culprits Behind a Struggling Lawn
Several factors can contribute to a lawn’s decline. Pinpointing the cause is key to effective treatment.
Drought Stress
- Symptoms: The grass turns a dull, grayish-green before becoming straw-like and brown. The blades may fold or roll up.
- Causes: Lack of rainfall, insufficient watering, hot temperatures.
Nutrient Deficiencies
- Symptoms: A general yellowing of the grass, often starting with the older leaves. The lawn may look thin and less vigorous.
- Causes: Soil lacking essential nutrients like nitrogen, iron, or magnesium.
Pests
- Symptoms: Patchy browning, thinning, or visible insects like grubs (found by digging), chinch bugs (small black insects with white markings), or sod webworms.
- Causes: Various soil-dwelling or surface-feeding insects attacking the grass roots or blades.
Diseases
- Symptoms: Spots, rings, or streaks of brown, yellow, or black on the grass blades. Some diseases can cause a fuzzy white or gray mold.
- Causes: Fungal pathogens thrive in specific environmental conditions (moisture, temperature, humidity).
Compacted Soil
- Symptoms: Poor drainage, shallow root growth, and a general lack of vigor. The grass may look thin and struggle to grow.
- Causes: Heavy foot traffic, mowing with heavy equipment, and poor soil structure.
Mowing Too Short
- Symptoms: The grass blades may turn brown or yellow at the tips, and the lawn can look sparse.
- Causes: Removing too much of the blade at once stresses the grass, making it vulnerable.
Thatch Buildup
- Symptoms: A thick, spongy layer between the grass blades and the soil surface. This can prevent water and nutrients from reaching the roots.
- Causes: Natural accumulation of dead grass and roots that don’t decompose quickly enough.
Step 2: Aeration and Dethatching for Better Access
Once you know why your lawn is struggling, you can start the physical work of revitalizing it. Aeration and dethatching are crucial for improving soil health and allowing water, air, and nutrients to reach the grass roots.
Aeration: Giving Roots Room to Breathe
Aeration involves creating small holes in the soil. This process alleviates soil compaction and allows for better penetration of water, air, and fertilizers.
- When to Aerate: The best times are during the active growing seasons of your grass type. For cool-season grasses (like fescue and ryegrass), this is typically spring and fall. For warm-season grasses (like Bermuda and Zoysia), late spring or early summer is ideal.
- How to Aerate:
- Core Aerator: This machine pulls out small plugs of soil, which is the most effective method. You can rent one or hire a professional service.
- Spike Aerator: While less effective, a spike aerator pushes spikes into the ground. Be sure to use one that penetrates at least 3-4 inches deep.
- After Aeration: Leave the soil plugs on the lawn; they will break down naturally and return nutrients to the soil.
Dethatching: Removing the Smothering Layer
Thatch is a layer of dead and living grass stems and roots that builds up between the grass blades and the soil. A thin layer (less than ½ inch) is beneficial, but excessive thatch can suffocate the lawn.
- When to Dethatch: Similar to aeration, dethatch during your grass’s active growing season.
- How to Dethatch:
- Raking: For light thatch, a stiff garden rake can do the job.
- Power Rakes/Scarifiers: These machines have tines that dig into the thatch layer and pull it to the surface. You can rent these tools.
- What to Do with Removed Thatch: Rake up all the loosened thatch and dispose of it. It can be composted, but avoid using it on your lawn if it’s diseased.
Table 1: Aeration and Dethatching Timing
| Grass Type | Best Time for Aeration | Best Time for Dethatching |
|---|---|---|
| Cool-Season | Spring and Fall | Spring and Fall |
| Warm-Season | Late Spring/Early Summer | Late Spring/Early Summer |
Step 3: Fertilizing for a Nutrient Boost
Once the soil is prepared, it’s time to give your lawn the nutrients it needs to recover. Proper fertilization promotes healthy growth and a vibrant green color.
Choosing the Right Fertilizer
Fertilizers are labeled with three numbers (e.g., 10-10-10), representing the percentage of nitrogen (N), phosphorus (P), and potassium (K) by weight.
- Nitrogen (N): Essential for green, leafy growth.
- Phosphorus (P): Important for root development.
- Potassium (K): Helps with overall plant health, disease resistance, and stress tolerance.
For a lawn that needs to green up yellow lawn and recover from stress, a balanced fertilizer with a higher nitrogen content is usually beneficial. Look for slow-release nitrogen to provide a steady supply of nutrients.
Application Guidelines
- Timing: Fertilize when the grass is actively growing. Avoid fertilizing dormant or stressed grass during extreme heat or drought.
- Application Rate: Always follow the instructions on the fertilizer package. Over-fertilizing can burn the grass and cause more damage.
- How to Apply: Use a broadcast spreader for even coverage. Lightly water the lawn after fertilizing to help the nutrients penetrate the soil and prevent leaf burn.
Addressing Specific Deficiencies
If you suspect a specific nutrient deficiency (e.g., iron for a very pale green color), you might consider a targeted supplement like liquid iron.
Step 4: Watering for Recovery and Growth
Proper watering is critical for reviving a struggling lawn, especially if you’re trying to improve dry lawn conditions or resuscitate scorched lawn.
Watering Depth and Frequency
- Deep Watering: Aim to water deeply but infrequently. This encourages grass to grow deeper roots, making it more drought-tolerant. Water until the soil is moist to a depth of 4-6 inches.
- Frequency: This depends on your soil type, weather, and grass type. Typically, watering once or twice a week is sufficient for established lawns during normal conditions. During hot, dry spells, you might need to water more often.
- Best Time to Water: Early morning is ideal. This allows the grass to absorb water before the heat of the day and reduces the risk of fungal diseases by allowing the blades to dry off. Avoid watering in the evening, as the grass can stay wet overnight.
Signs of Underwatering and Overwatering
- Underwatering: Wilting, bluish-green color, footprints remaining in the grass.
- Overwatering: Yellowing leaves, fungal diseases, shallow root systems.
Watering a Dry or Scorched Lawn
If your lawn is severely dry or scorched, you may need to water more frequently initially to rehydrate the soil and grass. Once it shows signs of recovery, gradually switch back to the deep, infrequent watering schedule.
Step 5: Overseeding and Patch Repair for Bare Spots
After addressing the soil and nutrient issues, it’s time to fill in any bare areas and thicken up thinning spots. This is crucial for fixing bare spots lawn and completing the process of lawn repair dead grass.
Overseeding for Thicker Growth
Overseeding involves spreading grass seed over an existing lawn. This is an excellent way to fill in thin areas and introduce new, healthy grass.
- When to Overseed: The best times are during the active growing seasons – fall for cool-season grasses and late spring/early summer for warm-season grasses.
- Choosing the Right Seed: Select a seed blend that is suitable for your climate and the existing grass type in your lawn.
- Preparation: Mow the lawn short, rake away any debris, and aerate or dethatch if you haven’t already. This helps the seeds make good contact with the soil.
- Application: Spread the seed evenly using a spreader. You can lightly rake the seeded area to ensure good soil contact.
- Watering After Seeding: Keep the seeded area consistently moist until the seeds germinate and the new grass is established. This usually means light watering multiple times a day.
Repairing Bare Patches
For larger bare areas, you might need to use sod or a patch repair kit.
- Patch Repair Kits: These often contain a mix of grass seed, mulch, and fertilizer. They are easy to use and effective for smaller bare spots.
- Sodding: For immediate results in very large bare areas, you can lay down sod. Ensure the soil underneath is prepared and that the sod is watered immediately after installation.
Repairing Dead Grass Spots
When dealing with lawn repair dead grass, it’s important to remove the dead material first.
- Rake out the dead grass: Loosen the dead turf and any underlying thatch with a rake.
- Loosen the soil: Use a garden fork or trowel to gently break up the compacted soil in the bare patch.
- Apply topsoil: Add a thin layer of good quality topsoil to the bare area.
- Sow seeds: Mix grass seed with a starter fertilizer and sow it over the prepared soil.
- Cover and water: Lightly cover the seeds with a thin layer of straw or mulch to retain moisture and prevent birds from eating the seeds. Water gently and consistently.
Tips for Ongoing Lawn Health
Bringing your lawn back to life is an ongoing process. Here are some tips to keep it healthy:
Proper Mowing Techniques
- Mow high: Set your mower to cut at a higher setting. Taller grass shades the soil, keeping it cooler and moister, and helps crowd out weeds.
- Sharp blades: Ensure your mower blades are sharp. Dull blades tear the grass, leaving it vulnerable to disease and giving it a brown, ragged appearance.
- Don’t remove too much at once: Never remove more than one-third of the grass blade height in a single mowing.
Weed and Pest Control
- Integrated Pest Management (IPM): Use a combination of methods, including cultural practices (healthy lawn), biological controls, and targeted pesticide use only when necessary.
- Hand-pulling weeds: For small infestations, hand-pulling is an effective and eco-friendly method.
- Spot treatment: If you need to use herbicides or insecticides, apply them only to the affected areas.
Seasonal Care
- Spring: Dethatch and aerate if needed, fertilize, and begin regular mowing.
- Summer: Water deeply during dry spells, spot treat weeds, and avoid excessive traffic on hot days.
- Fall: Aerate and overseed if necessary, fertilize to prepare for winter, and continue mowing.
- Winter: Avoid heavy traffic on frozen turf.
Soil Testing
Periodically testing your soil (every 1-3 years) can provide valuable information about its pH and nutrient levels, allowing you to make more precise adjustments. You can get soil test kits from your local garden center or cooperative extension office.
Frequently Asked Questions
How long does it take to revive a lawn?
The time it takes to revive a lawn depends on the extent of the damage and the methods used. You might see improvements within a few weeks of proper watering and fertilizing. However, restoring a severely damaged lawn with significant bare patches or disease can take several months, especially if overseeding or patch repair is involved.
What is the best time of year to revive a lawn?
The best time to revive a lawn is during its active growing season. For cool-season grasses, this is typically spring (April-May) and fall (September-October). For warm-season grasses, late spring and early summer are ideal.
Can I revive grass that is completely brown?
If the grass is completely brown and brittle, it is likely dead. However, if the brown grass is still flexible and the soil underneath is moist, it might be dormant due to heat or drought. In such cases, consistent watering can help revive it.
How do I deal with a lawn that has many bare spots?
To fix bare spots lawn, it’s best to remove any dead grass, loosen the soil, and then overseed or use a patch repair kit. Ensuring good seed-to-soil contact and consistent moisture is key to successful germination and establishment.
Is it better to overseed or replace sod?
Overseeding is generally more cost-effective and helps thicken an existing lawn. Sodding provides instant results and is a good option for large, severely damaged areas where quick coverage is desired.
By following these steps diligently, you can effectively revive dead grass, restore patchy lawn, green up yellow lawn, treat brown spots, and transform your entire yard into a lush, healthy green carpet. Remember that patience and consistent care are vital for a truly revitalized lawn.