
Can you fix dead patches in your lawn quickly and simply? Yes, you absolutely can! With a few straightforward steps, you can revive those barren areas and restore your lawn’s lush green appearance. This guide will walk you through the process, from identifying the cause to ensuring your lawn stays healthy and vibrant.
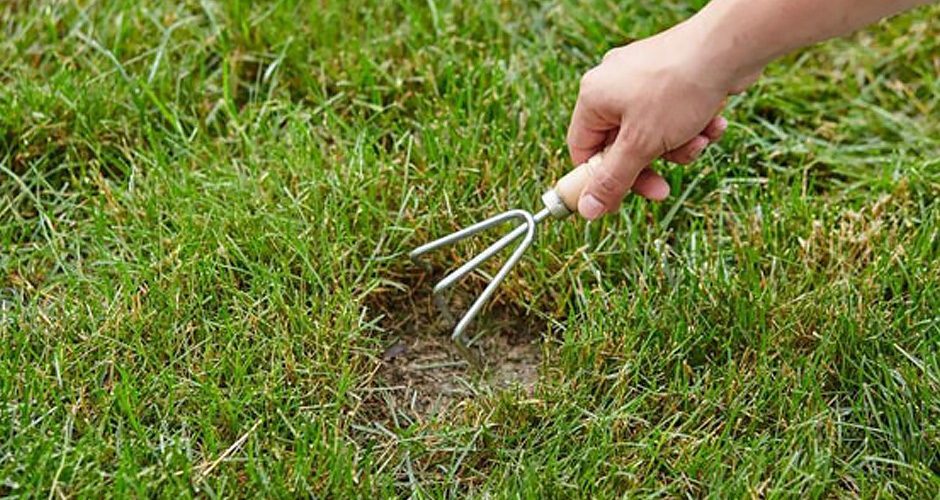
Image Source: contentgrid.homedepot-static.com
Discovering Why Your Lawn Has Dead Spots
Before you start fixing, it’s important to figure out why those spots appeared. This helps you prevent them from coming back. Common culprits include insect damage, pet urine, fungal diseases, and even just a lack of proper care.
Insect Invaders: Grubs and Other Pests
Grubs are a common enemy of a healthy lawn. These C-shaped larvae live in the soil and munch on grass roots. If you see brown, dead patches that lift up easily like a carpet, grubs are likely the cause.
- Signs of Grub Damage:
- Irregular brown patches that appear suddenly.
- Patches that feel spongy and can be pulled up easily.
- Birds, moles, or skunks digging in your lawn – they’re after the grubs!
The Menace of Fungal Diseases
Fungal diseases thrive in specific weather conditions, often when it’s humid or when grass is stressed. They can cause a variety of symptoms, from spots to rings of dead grass.
- Common Lawn Diseases:
- Dollar Spot: Small, straw-colored patches about the size of a silver dollar.
- Brown Patch: Circular patches that may have a darker border.
- Powdery Mildew: A white, powdery coating on grass blades.
Pet Peeves: The Impact of Pet Urine
If you have a dog, you might have noticed small, dead spots where they frequently “go.” Pet urine contains nitrogen, which is great in small amounts but can burn grass when concentrated.
- Pet Urine Spot Characteristics:
- Small, circular dead spots.
- Often surrounded by a ring of dark green, lush grass (from diluted urine).
Thirst and Hunger: Watering and Fertilizing Issues
Even the best lawns can develop dead spots if they aren’t getting enough water or nutrients.
- Underwatering: Causes grass to turn brown and go dormant.
- Overwatering: Can lead to shallow roots and fungal growth.
- Nutrient Deficiency: A lack of essential nutrients can weaken grass, making it more susceptible to damage.
Weed Woes: The Competition for Resources
Weeds compete with your grass for water, sunlight, and nutrients. Dense weed infestations can choke out healthy grass, leaving bare patches.
Physical Stress and Compaction
Heavy foot traffic, mowers, and even play can compact the soil. Compacted soil makes it hard for grass roots to grow and for water and air to penetrate.
Preparing the Ground: The First Step to Repair
Before you can lay down new seed or sod, the affected area needs proper preparation. This ensures the new grass has the best chance to grow strong.
Clearing Away the Dead Grass and Debris
First, you need to get rid of all the dead grass, weeds, and any other debris in the affected area. Use a stiff rake or a garden hoe to scrape away the dead material down to the bare soil. This makes sure that any new seeds you plant will have direct contact with the soil.
Tackling Soil Compaction: Lawn Aeration
If your soil is hard and compacted, especially in high-traffic areas, lawn aeration is crucial. Aeration involves creating small holes in the soil. This allows air, water, and nutrients to reach the grass roots more easily.
- How to Aerate:
- You can rent a core aerator, which pulls out small plugs of soil.
- Alternatively, a spiked aerator can be used, though it’s less effective than core aeration.
- Aeration is best done when the grass is actively growing.
Managing Thatch for Healthy Growth
Thatch removal is another vital step. Thatch is a layer of dead and living grass stems, roots, and debris that builds up between the green grass and the soil surface. A thin layer is good, but a thick layer can block water, air, and nutrients.
- Thatch Removal Methods:
- Raking: For light thatch, a stiff metal rake can often do the job.
- Dethatching Machine (Scarifier): For thicker thatch, rent a dethatching machine. It has blades that cut into the thatch layer.
Choosing Your Repair Method: Seed vs. Sod
Once the area is prepped, you have two main options for lawn patch repair: seeding or sodding.
Seeding for New Growth
Seeding is a cost-effective way to fill in bare spots. It requires patience as the seeds need time to germinate and establish.
Overseeding Bare Spots: The Art of New Seeds
Overseeding bare spots is the process of spreading grass seed over existing turf or bare soil.
- Select the Right Seed: Choose a grass seed mix that matches your existing lawn type and is suitable for your climate. Look for blends that are disease-resistant and drought-tolerant.
- Apply the Seed: Spread the seed evenly over the prepared soil. You can use a spreader for larger areas or do it by hand for small patches. A good rule of thumb is about 1 pound of seed per 100 square feet.
- Cover the Seed: Lightly rake the seeded area to ensure good seed-to-soil contact. You can also cover the seed with a thin layer of compost or straw to help retain moisture and protect the seeds.
- Watering: Keep the seeded area consistently moist, but not waterlogged, until the seeds germinate and the grass is established. This might mean light watering several times a day.
Sodding for Instant Results
Sodding involves laying down pieces of pre-grown grass. It’s a faster way to achieve a mature lawn but is more expensive.
- Prepare the Area: Ensure the bare patch is level and the soil is ready for the sod.
- Lay the Sod: Place the sod pieces tightly together, making sure there are no gaps. You may need to cut pieces to fit irregular shapes.
- Water Thoroughly: Water the newly laid sod immediately and deeply. Keep it moist for the first few weeks until the roots have a chance to grow into the soil below.
Nourishing Your Lawn for Robust Growth
Proper feeding is essential for repairing dead spots and keeping your entire lawn healthy.
The Importance of Soil Testing
Before you start fertilizing lawn, it’s a good idea to get a soil testing. A soil test will tell you the pH of your soil and what nutrients are lacking. This helps you choose the right fertilizer and soil amendments for your specific lawn needs.
- How to Soil Test:
- Contact your local cooperative extension office. They often offer affordable soil testing services.
- You can also buy DIY soil test kits at garden centers.
- Collect samples from different areas of your lawn and follow the instructions for sending them in or using the kit.
Fertilizing for a Green and Growing Lawn
Once you know what your soil needs, you can fertilize. Fertilizers provide the essential nutrients that grass needs to grow strong and fight off problems.
- When to Fertilize: The best times to fertilize are typically in the spring and fall, when the grass is actively growing.
- Types of Fertilizer:
- Granular Fertilizers: Easy to apply with a spreader and release nutrients slowly.
- Liquid Fertilizers: Provide a quick boost of nutrients but may need more frequent application.
- Application: Follow the instructions on the fertilizer bag carefully. Applying too much fertilizer can burn your lawn.
Addressing Specific Causes of Dead Spots
Depending on what caused your dead spots, you might need to take specific actions.
Dealing with Grub Infestations
If grubs are the culprit, you’ll need to use a grub treatment. These treatments are available as granules or liquids.
- Timing is Key: Apply grub treatments when the grubs are actively feeding near the surface, typically in late summer or early fall, or in the spring.
- Follow Instructions: Always follow the product instructions precisely for effective and safe application.
Fighting Lawn Diseases
For disease control lawn, prevention is often the best strategy. However, if you spot a disease, prompt action is needed.
- Identify the Disease: Accurately identifying the disease will help you choose the right treatment.
- Fungicides: There are various fungicides available, both organic and synthetic.
- Cultural Practices: Improving air circulation, avoiding overwatering, and proper mowing can help prevent diseases.
Implementing Weed Prevention Lawn Strategies
Weed prevention lawn is an ongoing effort. A healthy, dense lawn is the best defense against weeds.
- Pre-emergent Herbicides: These are applied in early spring before weed seeds germinate.
- Post-emergent Herbicides: Used to kill weeds that have already appeared.
- Manual Removal: Pulling weeds by hand is effective for small infestations.
- Healthy Turf: As mentioned, a thick, healthy lawn crowds out weeds.
Maintaining a Healthy Lawn Year-Round
Repairing dead spots is just part of the battle. Regular maintenance ensures your lawn stays healthy and prevents future problems.
Watering Lawn Properly: The Foundation of Health
Correct watering lawn properly is fundamental. Most lawns need about 1 to 1.5 inches of water per week, either from rain or irrigation.
- Water Deeply and Infrequently: This encourages deep root growth. Water until the soil is moist 4-6 inches down.
- Water in the Morning: This allows the grass to dry before nightfall, reducing the risk of fungal diseases.
- Adjust for Weather: Water more during hot, dry periods and less when it’s cool or rainy.
Mowing Practices for a Stronger Lawn
How you mow your lawn also plays a role in its health.
- Mow at the Right Height: Most cool-season grasses should be mowed at 2.5-3.5 inches. Taller grass shades out weeds and has deeper roots.
- Don’t Remove Too Much at Once: Never remove more than one-third of the grass blade length in a single mowing.
- Keep Mower Blades Sharp: Dull blades tear grass, making it susceptible to disease.
Seasonal Lawn Care Tips
Lawn care needs change with the seasons.
Spring Revitalization
- Clean Up: Rake leaves and debris.
- Fertilize: Apply a balanced fertilizer.
- Overseed: Address any bare spots from winter.
- Weed Control: Apply pre-emergent herbicides if needed.
Summer Care
- Water Consistently: Especially during dry spells.
- Mow Properly: Maintain the correct height.
- Monitor for Pests and Diseases: Act quickly if problems arise.
Fall Renewal
- Fertilize: Apply a fall fertilizer to help roots store energy.
- Overseed: This is an excellent time for overseeding.
- Dethatch and Aerate: If thatch buildup or compaction is an issue.
- Leaf Removal: Keep leaves off the lawn to prevent smothering.
Winter Preparation
- Final Mow: Mow slightly shorter before winter sets in.
- Water: Ensure the lawn is well-watered going into dormancy.
Common Lawn Patch Repair Scenarios and Solutions
Let’s look at some typical dead spot situations and how to fix them.
Scenario 1: Small, Irregular Brown Spots After Summer
Possible Cause: Insect damage (e.g., chinch bugs, sod webworms) or heat stress.
Repair Steps:
1. Identify: Check for insects by looking closely at the grass blades and soil.
2. Treat (if insect identified): Apply an appropriate insecticide if insect activity is confirmed.
3. Prepare Area: Rake out dead grass.
4. Overseed: Apply a quality grass seed mix suitable for your lawn.
5. Water: Keep the area consistently moist until established.
Scenario 2: Large, Dead Patches That Lift Easily
Possible Cause: Grub infestation.
Repair Steps:
1. Confirm Grubs: Dig up a section of the edge of the dead patch. If you see white grubs, it’s confirmed.
2. Grub Treatment: Apply a grub treatment according to product directions. Wait a few days for the treatment to work.
3. Prepare Area: Rake out all the dead grass and roots.
4. Overseed: Apply a good grass seed and cover lightly with compost.
5. Water: Maintain consistent moisture.
Scenario 3: Circular Patches with Dark Green Borders
Possible Cause: Dog urine spots.
Repair Steps:
1. Flush Area: Immediately after your pet urinates, water the area thoroughly to dilute the urine.
2. Prepare Area: Rake out the dead grass.
3. Amend Soil (Optional but Recommended): Mix in some compost to improve soil structure and add nutrients.
4. Overseed: Apply grass seed.
5. Water: Keep the patch moist.
6. Training: Consider training your dog to use a specific area of the yard.
Scenario 4: Yellowing or Brownish Patches with No Clear Cause
Possible Cause: Nutrient deficiency, improper watering, or a mild fungal issue.
Repair Steps:
1. Soil Test: Get a soil test to check nutrient levels and pH.
2. Fertilize: Apply a fertilizer based on the soil test results.
3. Adjust Watering: Ensure you are watering lawn properly – deep and infrequent.
4. Disease Control Lawn: If fungal issues are suspected, consider a broad-spectrum fungicide.
5. Overseed (if necessary): If patches remain bare after these steps, proceed with overseeding.
Frequently Asked Questions (FAQ)
Q1: How long does it take to repair dead spots in my lawn?
A1: The time it takes varies depending on the method used and the conditions. Seeding can take 2-4 weeks for germination and several more weeks to establish. Sodding provides instant results but requires ongoing care. Consistent watering and proper feeding will speed up the repair process.
Q2: Can I just throw seed on top of dead grass?
A2: No, it’s not effective. You must remove the dead grass and loosen the soil to ensure good seed-to-soil contact for germination.
Q3: What is the best time of year to repair dead spots?
A3: The best time is generally during the grass’s active growing seasons – spring and fall. This allows the new grass to establish before extreme summer heat or winter cold.
Q4: How do I prevent dead spots from returning?
A4: Consistent proper watering, appropriate fertilizing, regular mowing at the correct height, and addressing issues like thatch buildup, compaction, pests, and diseases will help prevent dead spots from reappearing.
Q5: Is lawn aeration really necessary for repairing dead spots?
A5: Lawn aeration is highly beneficial, especially if your soil is compacted. It improves air and water penetration to the roots, which is crucial for establishing new grass and revitalizing existing turf.
By following these detailed steps, you can effectively repair dead spots in your lawn and enjoy a lush, healthy green carpet once again. Remember to be patient and consistent with your lawn care efforts!