
Can I fix dead spots in my lawn quickly? Yes, you can! Addressing brown spots on lawn and bare patches in grass doesn’t have to be a long, drawn-out process. With the right approach, your grassy areas dying can be revitalized efficiently. This guide provides simple, actionable steps to bring your lawn back to life, turning those unsightly dead spots into lush green areas.
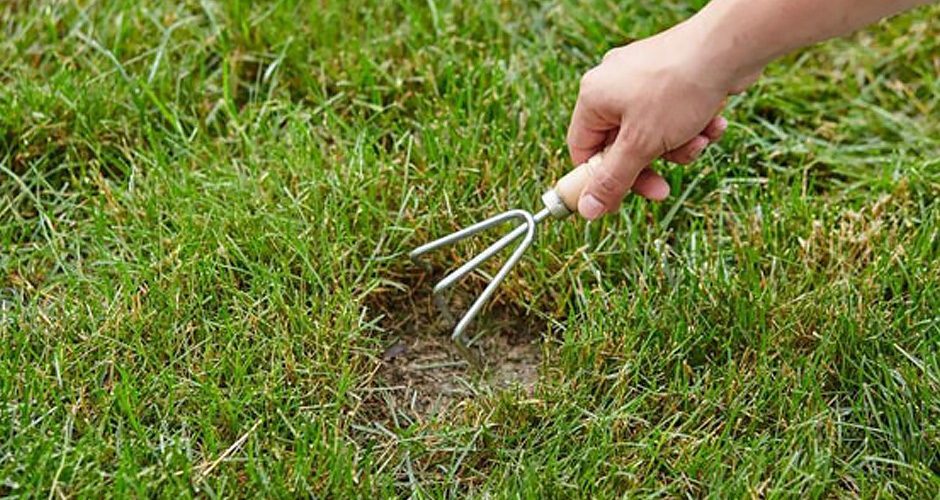
Image Source: contentgrid.homedepot-static.com
Why Is My Lawn Dying? Pinpointing the Problem
Before you can fix your lawn, you need to know why it’s dying. Many issues can cause brown spots on lawn and bare patches in grass. Identifying the root cause is the first crucial step in effective lawn repair.
Common Culprits Behind Lawn Death
- Watering Issues: Too much or too little water can stress grass.
- Pests and Diseases: Insects and fungi are notorious lawn killers.
- Compacted Soil: Hard soil prevents air, water, and nutrients from reaching roots.
- Thatch Buildup: An excessive layer of dead grass can suffocate the lawn.
- Nutrient Deficiencies: Lack of essential minerals weakens grass.
- Foot Traffic and Heavy Use: Constant pressure can damage grass blades and roots.
- Pet Urine: The high nitrogen content can burn grass.
- Sun or Shade Imbalance: Grass needs the right amount of sunlight.
Quick Fixes for Bare Patches in Grass
Once you’ve identified the cause, you can start the lawn repair process. Here are some fast-acting solutions for those stubborn bare patches in grass.
Step 1: Clear the Area
First, you need to prepare the dead spot for new growth. Remove all dead grass, weeds, and debris from the affected area. You can use a rake or a garden hoe for this. Ensure you get down to the bare soil.
Step 2: Amend the Soil (If Necessary)
Healthy soil is the foundation of a healthy lawn. If you suspect poor soil quality, this is the time to address it.
Basic Soil Amendment
For minor issues, simply loosening the soil with a garden fork can help. If the soil seems very hard or compacted, consider adding a thin layer of compost or a good quality topsoil. Mix it into the top few inches of the existing soil.
Soil Testing Lawn for Deeper Issues
For more persistent problems, a soil testing lawn kit is invaluable. These kits help you determine:
- pH Level: The acidity or alkalinity of your soil. Most grasses prefer a slightly acidic to neutral pH (6.0-7.0).
- Nutrient Levels: Identify deficiencies in nitrogen, phosphorus, potassium, and other micronutrients.
Based on the test results, you can amend the soil with specific fertilizers or soil conditioners. For example, if the pH is too low, you might add lime. If it’s too high, you’d add sulfur.
Step 3: Choose the Right Seed
Selecting the correct grass seed is vital for successful lawn repair, especially for fast results.
Seed Selection Tips:
- Match Existing Grass: Try to find a seed blend that matches the type of grass already in your lawn. This ensures a uniform look.
- Consider Your Climate: Choose a grass type suited to your region’s climate (cool-season or warm-season grasses).
- Fast-Growing Varieties: For quick fixes, look for fast-germinating seeds like perennial ryegrass. While it establishes quickly, it may require more care than other types.
Step 4: Sow the Seed
Sprinkle the grass seed evenly over the prepared soil. Follow the seeding rate recommended on the seed bag. A general guideline is about 1-2 ounces of seed per square foot for patch repair.
Step 5: Cover and Compact
Lightly rake the seed into the soil. You want the seeds to make good contact with the soil. A light layer of straw can help retain moisture and protect the seeds from birds. Gently tamp down the area with your feet or a roller to ensure good soil contact.
Step 6: Watering is Key
Proper watering is critical for seed germination and initial growth.
Watering Best Practices:
- Keep Seed Consistently Moist: The newly seeded area should be kept consistently moist, not waterlogged. Water lightly several times a day, especially during dry periods.
- Reduce Watering Frequency as Grass Grows: As the grass sprouts and grows taller, gradually reduce the frequency of watering but increase the amount. Aim for about 1 inch of water per week, delivered in one or two deep watering sessions.
Step 7: Fertilize (Optional but Recommended)
Applying a starter fertilizer can give your new grass the nutrients it needs to establish quickly. Look for a fertilizer with a higher phosphorus content (the middle number in the N-P-K ratio).
Addressing Brown Spots on Lawn from Specific Causes
Sometimes, brown spots on lawn are caused by specific issues that require targeted treatment.
Lawn Fungus Treatment
Brown spots on lawn can often be a sign of fungal diseases. Fungi thrive in certain conditions, such as excessive moisture, poor air circulation, and over-fertilization.
Identifying Common Lawn Fungi:
- Dollar Spot: Small, straw-colored spots about the size of a silver dollar, often with a reddish-brown border.
- Brown Patch: Circular patches of brown or straw-colored grass, often with a distinct dark border.
- Pythium Blight (Damping Off): Rapid wilting and browning, often appearing as dark, greasy-looking areas.
Lawn Fungus Treatment Methods:
- Improve Cultural Practices:
- Watering: Water early in the morning so the grass blades dry quickly. Avoid watering late in the day.
- Mowing: Keep mower blades sharp. Mow at the higher end of the recommended range for your grass type.
- Aeration: Improves air and water circulation.
- Thatch Removal: Prevents a buildup that harbors fungi.
- Apply Fungicides:
- Preventative: Applied before the disease appears, especially when conditions are favorable.
- Curative: Applied after the disease has been identified to control its spread.
- Always follow label instructions carefully when applying fungicides.
Insect Infestation Lawn
Grubs, chinch bugs, and sod webworms are common culprits that can cause brown spots on lawn. These insects feed on grass roots or blades, leading to wilting and death.
Signs of Insect Problems:
- Spongy Turf: Lift a section of turf; if it peels away easily like a carpet, grubs may be feeding on the roots.
- Irregular Brown Patches: Chinch bugs often cause irregular brown or yellowish patches, especially in sunny areas.
- Chewed Grass Blades: Sod webworms can chew the grass blades, leaving ragged edges or thinning areas.
Insect Infestation Lawn Solutions:
- Identify the Pest: It’s crucial to know which insect you’re dealing with. You might need to dig a small section of turf to look for grubs.
- Cultural Controls:
- Proper Watering: Healthy, well-watered lawns can better withstand minor infestations.
- Mowing Height: Taller grass can shade the soil, making it less hospitable for some pests like chinch bugs.
- Beneficial Nematodes: These microscopic worms are natural predators of many soil-dwelling insects like grubs.
- Insecticides:
- Chemical Insecticides: Available in granular or liquid forms. Choose a product specifically formulated for the pest you’ve identified.
- Biological Insecticides: Products containing Bacillus thuringiensis (Bt) can be effective against certain lawn caterpillars.
- Again, always read and follow product instructions precisely.
Revitalizing Grassy Areas Dying: Advanced Techniques
For larger or more stubborn dead zones, a more comprehensive approach might be needed.
Thatch Removal Lawn
Excessive thatch (a layer of dead and living grass stems and roots) can prevent water, air, and nutrients from reaching the soil. A thatch layer thicker than ½ inch is problematic.
When and How to Remove Thatch:
- Timing: Best done in the late summer or early fall for cool-season grasses, or late spring for warm-season grasses. Avoid doing it when the grass is stressed by heat or drought.
- Methods:
- Power Raking (Dethatching): Use a power rake (also called a dethatcher) with vertical blades that cut into the thatch layer. Rake in several directions.
- Manual Raking: For smaller areas, a stiff metal rake can be used.
- Aftercare: After dethatching, you’ll have a lot of debris. Rake it up and dispose of it. This is an excellent time to aerate and overseed.
Aeration and Overseeding
Aeration and overseeding is a powerful combination for lawn repair and revitalizing grassy areas dying.
Lawn Aeration:
Aeration involves creating small holes in the soil to relieve compaction. This allows air, water, and nutrients to penetrate the root zone.
- Types of Aeration:
- Core Aeration: The most effective. It pulls out plugs of soil.
- Spike Aeration: Pushes spikes into the ground, less effective for severe compaction.
- When to Aerate: Best done when the grass is actively growing. For cool-season grasses, this is typically in early fall or spring. For warm-season grasses, it’s late spring or early summer.
- How to Do It: Rent a core aerator. Make passes in multiple directions (e.g., north-south, then east-west). Leave the soil plugs on the surface; they will break down and return nutrients to the soil.
Overseeding:
This is the process of sowing new grass seed over an existing lawn. It’s often done immediately after aeration.
- Why Overseed?
- Fills in thin areas.
- Introduces improved grass varieties that are more resistant to disease, drought, or pests.
- Improves the overall density and appearance of the lawn.
- How to Overseed:
- After aerating, spread your chosen grass seed over the lawn.
- Lightly rake the seed into the aeration holes for good soil contact.
- Apply a starter fertilizer.
- Water regularly to keep the seed moist until germination.
Watering Lawn Properly
Incorrect watering lawn properly is a major cause of lawn problems. Overwatering can lead to fungal diseases and shallow root systems, while underwatering stresses the grass, making it susceptible to drought and pests.
Best Practices for Watering Lawn Properly:
- Deep and Infrequent Watering: Encourage deep root growth by watering thoroughly but less often. Aim for about 1 inch of water per week, applied in one to two sessions.
- Water in the Morning: This allows the grass blades to dry before nightfall, reducing the risk of fungal diseases.
- Check Soil Moisture: Stick a screwdriver or a soil moisture meter into the ground. If it goes in easily to a depth of 6 inches, the soil is likely moist enough. If it’s difficult to push in, it’s too dry.
- Adjust for Weather: Water more during hot, dry periods and less during cool, rainy weather.
- Use a Rain Gauge: Ensure you’re not overwatering by using a rain gauge to track how much precipitation your lawn receives.
Putting It All Together: A Fast-Track Lawn Repair Plan
Here’s a step-by-step plan to fix dead spots quickly:
Day 1-3: Assessment and Preparation
- Inspect: Walk your lawn and identify all dead or thinning areas. Note any visible signs of pests, diseases, or compaction.
- Soil Test: If you suspect soil issues, send a sample for testing or use a home kit.
- Clear: Rake out all dead grass, weeds, and debris from the bare patches.
- Address Immediate Issues: If you see obvious signs of insect infestation or fungus, apply a targeted treatment according to product instructions.
Day 4-7: Soil Improvement and Seeding
- Amend Soil: Based on your soil test, add any necessary amendments (lime, sulfur, compost). Loosen compacted soil with a fork or aerator.
- Seed: Sow the appropriate grass seed into the prepared soil. Lightly rake and tamp.
- Fertilize: Apply a starter fertilizer.
- Water: Begin consistent light watering to keep the seed moist.
Week 2-4: Germination and Early Growth
- Monitor Watering: Continue to water lightly and frequently until the grass sprouts.
- Transition Watering: As the grass grows to about 1 inch, start watering more deeply and less frequently.
- First Mowing: When the new grass reaches about 3 inches, mow it for the first time. Use a sharp blade and set the mower to a higher setting. Do not remove more than one-third of the blade height.
- Ongoing Care: Continue proper watering and mowing. Avoid heavy traffic on the newly seeded areas until the grass is well established (usually 4-6 weeks).
Long-Term Maintenance for a Healthy Lawn
- Regular Mowing: Mow at the correct height for your grass type.
- Consistent Watering: Follow the deep, infrequent watering schedule.
- Seasonal Fertilization: Feed your lawn at the right times of year with appropriate fertilizers.
- Annual Aeration and Overseeding: This is key to preventing future problems and maintaining a dense, healthy lawn.
Lawn Repair Troubleshooting: What If It’s Not Working?
If you’ve followed these steps and are still seeing bare patches in grass or brown spots on lawn, consider these possibilities:
- Incorrect Seed Choice: The seed may not be suited for your climate or soil conditions.
- Insufficient Light/Water: The area might not be getting enough sun or water for the chosen grass type.
- Persistent Pests/Diseases: The initial treatment might not have been strong enough, or a different pest/disease could be present.
- Severe Soil Compaction: For extreme compaction, repeated aeration may be necessary.
- Heavy Foot Traffic: Is the area still being subjected to excessive use?
In such cases, reassess the situation, consider another soil test, or consult a local lawn care professional for expert advice on dealing with grassy areas dying.
Frequently Asked Questions (FAQ)
Q1: How fast can I realistically expect to see new grass growing in dead spots?
A1: With the right seed and consistent moisture, you can often see germination within 7-14 days for fast-growing varieties like perennial ryegrass. Full establishment can take 3-6 weeks.
Q2: Can I just throw seed on top of the dead spot without preparing the soil?
A2: While some seeds might sprout, success rates are very low. Proper soil preparation, including loosening the soil and ensuring good seed-to-soil contact, is crucial for germination and healthy root development.
Q3: Is it okay to water the lawn every day when trying to fix dead spots?
A3: When you first sow seed, you need to keep the top layer of soil consistently moist, which might mean watering lightly multiple times a day. However, once the grass sprouts, you should transition to deeper, less frequent watering to encourage strong roots and prevent fungal diseases.
Q4: My dog peed on the lawn and killed a patch. How do I fix this?
A4: For pet urine spots, clear the dead grass, loosen the soil, and reseed as described in the steps above. You can also try to water the area thoroughly immediately after your pet has urinated to dilute the nitrogen.
Q5: What is thatch, and why is thatch removal lawn important?
A5: Thatch is the layer of dead and living grass stems and roots that builds up on the soil surface. It’s important for thatch removal lawn because an excessive layer (over half an inch) can block water, air, and nutrients from reaching the soil and roots, and it can also harbor pests and diseases.
Q6: When is the best time for aeration and overseeding?
A6: The ideal time for aeration and overseeding is when your grass is actively growing. For cool-season grasses (like fescues, bluegrass, and ryegrass), this is typically early fall or spring. For warm-season grasses (like Bermuda, Zoysia, and St. Augustine), it’s late spring or early summer.
Q7: My lawn has many brown spots on lawn. Could it be a disease?
A7: Yes, brown spots on lawn are often a symptom of fungal diseases. Factors like overwatering, poor air circulation, and excessive nitrogen can contribute to fungal growth. Identifying the specific disease and applying the correct lawn fungus treatment is important.
Q8: I see small holes and chewed grass blades. What insect could be causing this?
A8: Small holes in the soil might indicate grub activity. Chewed grass blades, especially with ragged edges, could be caused by sod webworms or armyworms. An insect infestation lawn needs to be properly identified to ensure effective treatment.