
Yes, you can fix most common types of lawn furniture yourself with a few basic tools and some patience. This guide will walk you through simple DIY steps to repair and refresh your outdoor seating, extend its lifespan, and save you money.
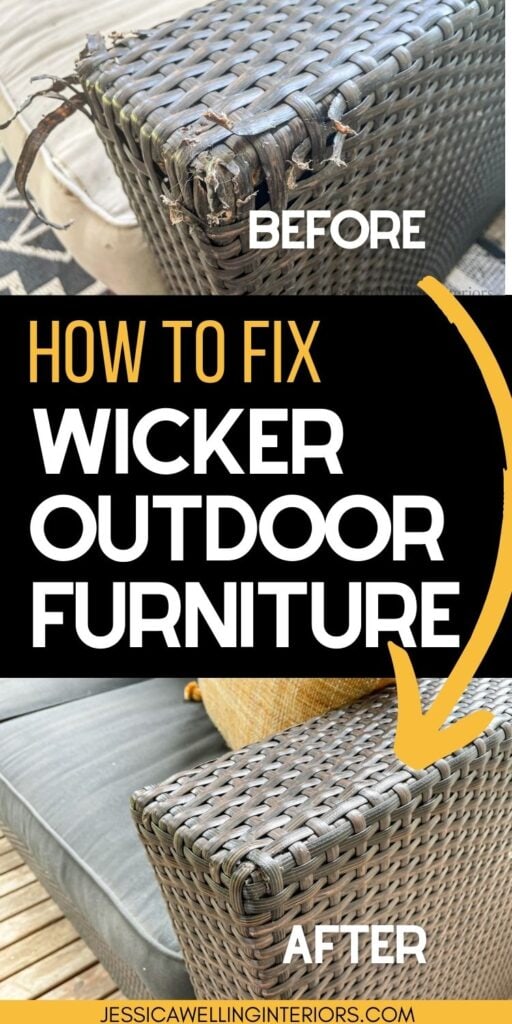
Image Source: jessicawellinginteriors.com
Revitalizing Your Outdoor Oasis: Simple Fixes for Lawn Furniture
Your lawn furniture is the heart of your outdoor living space. It’s where you relax, entertain guests, and soak up the sunshine. But over time, even the most durable pieces can show signs of wear and tear. Sun, rain, and constant use can lead to fading, rust, wobbly legs, and torn fabric. Don’t let a few dings and scuffs send your beloved patio set to the curb! With some easy DIY fixes, you can breathe new life into your lawn furniture, making it look and feel like new again.
Restoring Patio Chairs: Bringing Back the Comfort and Style
Patio chairs often bear the brunt of outdoor conditions. Whether they’re made of wood, metal, or wicker, common issues include loose joints, peeling paint, faded fabric, and general grime.
Repairing Wooden Patio Chairs: A Guide to Refinishing
Wood furniture offers classic beauty but requires regular maintenance.
* Cleaning: Start by giving your wooden chairs a good scrub. Use a mild soap and water solution with a soft brush. For stubborn dirt or mildew, a solution of one part bleach to three parts water can be effective, but rinse thoroughly afterward.
* Sanding: Once dry, sand the entire piece. Begin with a medium-grit sandpaper (around 80-120 grit) to remove old finishes, peeling paint, and smooth out rough spots. Follow up with a finer grit (180-220 grit) for a smoother surface. Always sand in the direction of the wood grain.
* Repairing Loose Joints: Loose joints are a common problem.
* Disassemble: If possible, carefully take apart any loose sections.
* Glue: Apply a strong exterior wood glue to both surfaces of the joint.
* Clamp: Reassemble the parts and clamp them securely. Use wood clamps or even rope if clamps aren’t available, ensuring the joint is held tightly. Wipe away any excess glue immediately with a damp cloth.
* Reinforce: For extra strength, consider adding screws or nails after the glue has dried, pre-drilling to prevent splitting.
* Refinishing: After sanding and repairs, it’s time to protect and beautify.
* Stain or Paint: Apply an exterior-grade stain to enhance the wood’s natural beauty or a high-quality exterior paint for a pop of color. Apply thin, even coats and allow each to dry completely according to the product instructions.
* Sealant: Finish with at least two coats of an exterior-grade sealant or varnish. This will protect the wood from moisture and UV rays, preventing future damage.
Fixing Metal Furniture: Tackling Rust and Wear
Metal lawn furniture, like wrought iron or aluminum, is durable but susceptible to rust.
* Cleaning: Wash the furniture thoroughly with soap and water. For stubborn dirt or mildew, a bit of vinegar in the water can help. Rinse and dry completely.
* Addressing Rust: This is a crucial step for metal.
* Rust Removal: For light rust, a wire brush or sandpaper should suffice. For heavier rust, a rust converter or a rust-removing chemical might be needed. Always follow the product’s safety instructions and wear gloves and eye protection.
* Sanding: After rust removal, sand the affected areas smooth.
* Priming: Apply a metal primer specifically designed for outdoor use. This creates a barrier against future rust and ensures better adhesion for your topcoat. Let the primer dry completely.
* Painting: Use a high-quality exterior metal paint. Spray paints offer a smooth, even finish, but brush-on options work well too. Apply several thin coats rather than one thick one for a durable and attractive finish. Allow adequate drying time between coats.
Repairing Wicker Furniture: Mending the Weave
Wicker furniture, whether made from natural rattan or synthetic resin, can suffer from broken strands or unraveling sections.
* Cleaning: Gently clean wicker with a soft brush and a mild soap and water solution. For natural wicker, avoid soaking it. Rinse with a damp cloth and allow it to dry thoroughly.
* Repairing Wicker Weave: This is where patience comes in.
* Identify Damage: Locate any broken or loose strands.
* Replacement Strands: For natural wicker, you can often buy replacement rattan reeds. For synthetic wicker, you might need to find matching material from an old piece or a specialized supplier.
* Weaving: Carefully weave the new strands into the existing weave, mimicking the original pattern. You might need to use a small awl or screwdriver to lift existing strands and make space for the new ones.
* Securing: Once woven in, secure the ends with a small amount of strong glue suitable for outdoor use. You can also use fine wire or staples, hidden as much as possible, for added security.
* Repairing Loose Sections: If a section is unraveling, try to glue the loose ends back into place. You might need to temporarily hold them with clips or tape until the glue dries.
Giving Patio Chairs a New Look: Beyond Simple Repairs
Sometimes, your patio chairs are structurally sound but just look tired. Here’s how to refresh their appearance.
Refinishing Wood Furniture: A Complete Makeover
This involves stripping down the old finish and applying a new one.
* Stripping: Use an exterior-grade paint or varnish stripper. Apply it according to the manufacturer’s instructions, let it work, and then scrape away the old finish with a putty knife or scraper. A wire brush can help in crevices.
* Sanding: Once stripped, sand the wood thoroughly as described in the wooden chair repair section.
* Staining or Painting: Apply your chosen stain or paint for a fresh look.
* Sealing: Finish with multiple coats of a high-quality exterior sealant to protect your work.
Reupholstering Outdoor Cushions: Comfort and Style Restored
Faded or torn cushion covers can make even the most comfortable chairs look uninviting.
* Choosing Fabric: Select outdoor-specific fabric. These fabrics are designed to be fade-resistant, water-repellent, and mildew-resistant. Look for materials like acrylic or polyester treated for outdoor use.
* Measuring: Carefully measure your existing cushions. You’ll need measurements for length, width, and thickness for both the top and bottom panels, as well as for the side panels (often called a welting or piping if there’s a cord).
* Cutting Fabric: Cut your new fabric, adding about 1 inch for seams on all edges. If your cushion has a welt cord, you’ll need to cut strips for that as well.
* Sewing:
* Welting (Optional): If you’re adding welt cord, sew it to the edge of one of the main cushion panels (either top or bottom) before you start joining the panels.
* Joining Panels: Pin the top and bottom cushion panels right sides together, along with the side panels or welting, and sew them using a strong stitch. Leave an opening large enough to insert the cushion insert. Use a durable thread, like polyester.
* Zipper or Velcro: For easy removal and cleaning, consider sewing in a zipper or heavy-duty Velcro closure in the opening.
* Stuffing: Insert the cushion form into the new cover. If your old insert is damaged, you can buy new foam or polyester filling.
* Finishing: Close the opening securely.
Cleaning Outdoor Cushions: A Refresh Without Replacing
If the fabric is still in good condition, a thorough cleaning can make a big difference.
* Spot Cleaning: For minor stains, use a mild soap and water solution and a soft brush or cloth. Rinse with a clean, damp cloth and allow to air dry completely.
* Deep Cleaning: For tougher dirt or mildew, create a solution of one part bleach to four parts water. Apply it to the fabric with a spray bottle or cloth, let it sit for a few minutes, and then scrub gently with a soft brush. Rinse thoroughly with a hose or clean, damp cloths. It’s essential to rinse all the bleach away to prevent fabric damage.
* Mold and Mildew Treatment: If you have stubborn mold or mildew, a specialized outdoor fabric cleaner can be effective. Always test on an inconspicuous area first.
* Drying: Ensure cushions are completely dry before putting them back on furniture or storing them to prevent mildew growth.
Fixing a Broken Umbrella: Enjoying Shade Again
A broken patio umbrella can ruin a sunny day. Most common issues are fixable.
Fixing a Broken Umbrella Pole or Ribs
- Loose Connections: Check if any umbrella ribs are simply loose at their connection points. Often, a small screw or rivet can be tightened or replaced.
- Bent Ribs: For slightly bent ribs, you can try carefully bending them back into shape. Use pliers gently. If a rib is severely bent or cracked, it might need replacement. You can sometimes find replacement ribs from the umbrella manufacturer or a specialized parts supplier.
- Cracked Pole: If the main pole has a crack, you can try reinforcing it with strong tape designed for outdoor use, or for a more permanent fix, you might need to splice in a new section of pole if possible.
Replacing Patio Umbrella Fabric
This is a common and very doable repair.
* Measure Your Umbrella: You’ll need to know the diameter of your umbrella when open and how many panels it has. Measure the length of one of the canopy’s gores (the fabric section between two ribs).
* Purchase Replacement Fabric: Many companies sell pre-made replacement canopies designed to fit specific umbrella sizes and rib counts. Ensure you choose an outdoor-rated fabric. Alternatively, you can buy fabric by the yard and cut it yourself, but this requires more precision.
* Attaching New Fabric:
* Remove Old Fabric: Carefully detach the old canopy from the ribs and the central hub. This usually involves unthreading it from pockets and sometimes undoing small stitches or clips.
* Install New Fabric: Thread the new fabric onto the ribs, securing it in the pockets. Ensure it’s spread evenly.
* Secure: Fasten the bottom edge of the fabric where it meets the end of each rib, often with small ties or by sewing it around the rib tip. Reattach any central hub covers or caps.
Repairing Other Lawn Furniture Items
Don’t forget other pieces that might need attention.
Fixing Rusty Furniture: Beyond the Basics
We’ve touched on metal, but what about other materials?
* Metal: As covered, cleaning, sanding, priming, and painting are key. For very heavily rusted items, consider a metal restoration product that chemically converts rust.
* Wood: Rust can also form on metal fasteners within wooden furniture. Remove the fasteners, clean the rust off them (or replace them), and clean out the wood where the rust stained it before reassembly.
General Maintenance and Prevention
- Regular Cleaning: Wash your furniture at least once a season.
- Protective Covers: Use covers when furniture isn’t in use, especially during off-seasons or periods of heavy rain.
- Storage: If possible, store cushions and umbrellas indoors during harsh weather or winter.
- Tighten Hardware: Periodically check and tighten any loose screws, bolts, or nuts.
By following these DIY steps, you can significantly extend the life of your lawn furniture, keeping your outdoor spaces looking welcoming and functional without breaking the bank.
Frequently Asked Questions (FAQ)
Q1: What is the best way to clean mildew from outdoor cushions?
A1: A solution of one part bleach to four parts water is generally effective. Apply with a spray bottle or cloth, let it sit for a few minutes, scrub gently with a soft brush, and then rinse thoroughly. Always test on an inconspicuous area first and ensure the cushions dry completely.
Q2: Can I repair cracked wicker furniture?
A2: Yes, for minor cracks or breaks in the wicker weave, you can often use a strong outdoor-specific glue to reattach the pieces or weave in new strands to bridge the gap. For larger structural damage, it might be more challenging.
Q3: How do I prevent rust on my metal lawn furniture?
A3: Regular cleaning, applying a rust-inhibiting primer before painting, using high-quality exterior metal paint, and applying a clear sealant are the best preventative measures. Using furniture covers when not in use also helps significantly.
Q4: What kind of fabric is best for reupholstering outdoor cushions?
A4: Look for outdoor-specific fabrics like solution-dyed acrylics or treated polyesters. These materials are designed to resist fading, water, and mildew.
Q5: My wooden patio chairs are wobbly. How can I fix them?
A5: Wobbly chairs usually have loose joints. Try disassembling the loose section, cleaning out old glue, applying new exterior wood glue, and clamping the joint tightly until the glue dries. Reinforcing with screws can also help.
Q6: My umbrella fabric is torn. Can I replace just the fabric?
A6: Yes, in most cases, you can buy replacement canopy fabric specifically designed for patio umbrellas. You’ll need to measure your umbrella carefully and then follow instructions to attach the new fabric to the frame.