
Can you get rid of lawn thatch quickly? Yes, you can significantly reduce thatch buildup in your lawn quickly with the right techniques and tools. This guide will show you how to efficiently tackle thatch for a healthier, more vibrant lawn.
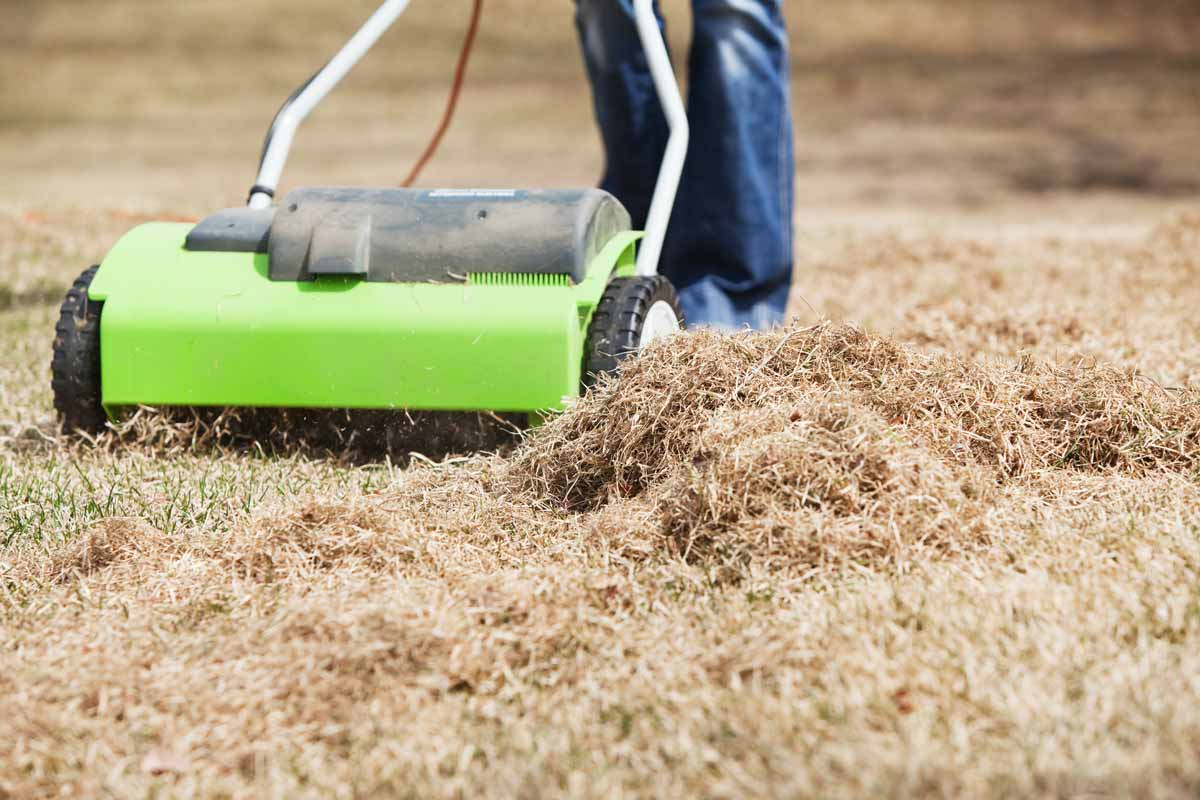
Image Source: www.greenviewfertilizer.com
What is Lawn Thatch?
Lawn thatch is a layer of dead and living plant material, like stems, roots, and crowns, that accumulates between the green grass blades and the soil surface. While a thin layer is normal and can even insulate the soil and roots, an excessively thick layer can cause serious problems for your lawn’s health.
Why Thatch Becomes a Problem
A thick thatch layer, generally considered more than half an inch, acts like a sponge. It can:
- Block essential nutrients and water: The dense mat prevents rain, air, and fertilizers from reaching the soil and roots.
- Harbor pests and diseases: The damp, shaded environment is ideal for grubs, chinch bugs, and fungal diseases.
- Cause a spongy, uneven lawn: This makes mowing difficult and can lead to scalping.
- Hinder root growth: Roots struggle to penetrate the thick layer, leading to shallow root systems that are less resistant to drought and heat.
Identifying Excessive Thatch in Your Lawn
Before you can tackle thatch, you need to know if you have a problem. It’s easy to spot if you know what to look for.
How to Check for Thatch
- Cut a Plugs: Use a trowel or a soil sampler to remove a small section of your lawn.
- Measure the Layer: Look at the plug. The thatch layer is the brown, spongy material between the green grass and the soil. If this layer is thicker than half an inch, it’s time to take action.
Methods to Remove Thatch from Grass
There are several effective methods to remove thatch, ranging from manual to power-assisted options. Choosing the right method depends on the severity of the thatch and the size of your lawn.
Dethatching Lawn Manually
For small lawns or areas with light thatch, manual dethatching can be sufficient. This involves using a specialized tool to rake and pull out the thatch.
Tools for Manual Dethatching
- Thatch Rake (Dethatching Rake): This rake has stiff, sharp tines designed to dig into the soil and pull up thatch. It’s like a heavy-duty garden rake but with more aggressive tines.
- Leaf Rake: While not ideal, a stiff leaf rake can help with very light thatch buildup.
Manual Dethatching Technique
- Timing is Key: Dethatch when your grass is actively growing, usually in spring or fall.
- Work in Sections: Start in one corner of your lawn and work your way across.
- Rake Vigorously: Use firm, steady strokes to pull the thatch out. You’ll see the dead material accumulating.
- Collect and Dispose: Rake up the loosened thatch and dispose of it. It can be composted if you don’t have disease issues.
- Water and Fertilize: After dethatching, water your lawn and apply a suitable fertilizer to help it recover and grow.
Power Rake Lawn for Faster Thatch Removal
For larger lawns or those with significant thatch buildup, a power rake lawn service or renting a power rake is highly recommended. Power raking is much more efficient and effective than manual raking.
What is a Power Rake?
A power rake, also known as a verticutter or scarifier, is a machine with rotating blades or tines that cut vertically into the turf. These blades slice through the thatch layer and can even lightly scarify the soil surface, encouraging new growth.
Using a Power Rake
- Choose the Right Machine: You can rent a power rake or hire a lawn care professional. Ensure the machine has adjustable depth settings.
- Set the Depth: For initial dethatching, set the blades to about 1/4 inch into the soil. You can adjust this deeper if needed.
- Mow the Lawn: Mow your grass to about 1 to 1.5 inches before power raking. This makes the process easier and more effective.
- Operate the Power Rake: Push the machine forward slowly and steadily across your lawn. The blades will churn up the thatch.
- Multiple Passes: You may need to make several passes, going in different directions (e.g., north-south and then east-west), to thoroughly remove the thatch.
- Collect the Debris: The power rake will leave a significant amount of thatch and debris on the surface. Rake this up thoroughly using a stiff garden rake or a collection bag attachment if your machine has one.
- Water and Fertilize: Water your lawn well after power raking and apply a balanced fertilizer to aid recovery.
Verticutting Grass: A More Aggressive Approach
Verticutting grass is similar to power raking but often involves more aggressive, sharper blades that cut deeper into the turf and soil. This is a more intense process that can be very effective for severe thatch problems.
When to Verticut
- Severe Thatch: When thatch is more than an inch thick.
- Compacted Soil: Verticutting can help break up soil compaction along with thatch.
- Overseeding: Verticutting opens up the soil surface, creating an ideal seedbed for overseeding.
Verticutting Process
The process for verticutting is very similar to power raking:
- Preparation: Mow the lawn low (1-1.5 inches) and ensure the grass is dry.
- Machine Selection: Use a dedicated verticutter or a power rake with very sharp, aggressive blades.
- Depth Adjustment: Set the blades to cut about 1/4 to 1/2 inch into the soil.
- Passes: Make slow, overlapping passes, often in two directions.
- Cleanup: Collect all the loosened thatch and debris.
- Post-Verticut Care: Water thoroughly and fertilize. Overseeding is often recommended after verticutting to fill in any bare spots.
Lawn Scarifying: The Art of Surface Improvement
Lawn scarifying is a broader term that encompasses methods like verticutting and power raking. The primary goal of scarifying is to remove thatch and surface debris while also lightly grooming the soil to improve air and water penetration and encourage healthier grass growth.
Scarifying Benefits
- Thatch Removal: Directly addresses the core issue.
- Weed Control: Can uproot shallow-rooted weeds.
- Improved Aeration: Helps air and water reach the roots.
- Stimulates Growth: Encourages new grass shoots from the base.
Scarifying Tools and Techniques
Scarifying can be done with manual tools (scarifying rakes) or powered machinery (verticutters, power rakes). The technique involves the same principles of cutting into the thatch layer and surface debris.
Aerating Lawn for Thatch: A Complementary Approach
While aeration doesn’t directly remove thatch, it’s a crucial step in managing thatch buildup and improving the overall health of your lawn, making it more resistant to thatch problems. Aerating lawn for thatch involves creating small holes in the soil.
How Aeration Helps with Thatch
- Improves Airflow: Allows oxygen to reach the roots, which helps break down organic matter (including thatch) naturally.
- Enhances Water Penetration: Helps water reach the root zone, reducing surface moisture that can worsen thatch.
- Reduces Soil Compaction: Compacted soil traps moisture and hinders root growth, contributing to thatch issues. Aeration loosens the soil.
- Assists Decomposition: The plugs of soil pulled up by core aerators break down and can help mix into the thatch layer, speeding up decomposition.
Types of Aeration
- Core Aeration: This is the most effective type for thatch control. It uses hollow tines to pull out plugs of soil, thatch, and roots. These plugs are left on the surface to decompose.
- Spike Aeration: This method uses solid tines to poke holes into the soil. It’s less effective for significant thatch removal compared to core aeration but can still improve airflow and water penetration.
When to Aerate for Thatch
- Spring or Fall: Aerate when the grass is actively growing, so it can recover quickly.
- After Dethatching: Aerating after dethatching can further improve soil contact for new growth and aid in the decomposition of any remaining thatch.
Best Dethatcher Options for Your Lawn
Choosing the best dethatcher depends on your lawn’s size, the thickness of the thatch, and your budget.
Manual Dethatchers
- Pros: Affordable, no fuel or electricity needed, good for small lawns and light thatch.
- Cons: Labor-intensive, slow for large areas, less effective on thick thatch.
- Examples: Fiskars Softouch Dethatching Rake, Garden Tool Scarifier Rake.
Electric Dethatchers
- Pros: Lighter than gas models, quieter, good for small to medium lawns, less maintenance.
- Cons: Limited by cord length, power may be less than gas models for very thick thatch.
- Examples: Greenworks 12 Amp Corded Dethatcher, VonHaus Electric Scarifier.
Gas-Powered Dethatchers (Power Rakes/Verticutters)
- Pros: Most powerful, efficient for large lawns and heavy thatch, deeper penetration.
- Cons: Heavier, noisier, require fuel and more maintenance, can be more expensive.
- Examples: Troy-Bilt TB155SS 2-in-1 Scarifier/Aerator, Husqvarna DT25 Lawn Scarifier.
Rental Options
- Pros: Access to professional-grade equipment without the cost of ownership, good for occasional use.
- Cons: Availability can be an issue, requires transport, you need to be comfortable operating the machinery.
Lawn Care Thatch Management Strategies
Preventing excessive thatch buildup is as important as removing it. Consistent lawn care practices can significantly reduce thatch over time.
Regular Mowing Practices
- Mow High: Cutting your grass too short stresses the plant, encouraging it to produce more underground stems and crowns, thus contributing to thatch. Maintain the recommended mowing height for your grass type.
- Don’t Remove More Than One-Third: Never cut off more than one-third of the grass blade length at a time. This prevents shocking the grass and minimizes thatch production.
- Mulching Mower: Use a mulching mower to finely chop grass clippings. These small pieces decompose quickly and can actually be beneficial for the soil, adding nutrients and organic matter.
Proper Watering
- Water Deeply and Infrequently: Encourage deep root growth by watering thoroughly only when the lawn needs it. Shallow, frequent watering promotes shallow roots that are more prone to thatch issues.
- Avoid Overwatering: Excess moisture can contribute to anaerobic conditions that hinder thatch decomposition.
Fertilization
- Use Slow-Release Fertilizers: These release nutrients gradually, preventing sudden growth spurts that can lead to thatch.
- Avoid Over-Fertilizing: Too much nitrogen can stimulate excessive top growth and thatch production. Follow recommended application rates.
- Fertilize at the Right Times: Fertilizing during peak growing seasons (spring and fall for cool-season grasses, summer for warm-season grasses) supports healthy growth without excessive thatch buildup.
Aeration
- Annual or Bi-Annual Aeration: As mentioned earlier, regular core aeration is one of the best ways to manage thatch and improve soil health.
Overseeding
- Improve Density: A dense, healthy lawn crowds out weeds and is more efficient at processing organic matter. Overseeding with a quality seed blend can help thicken your turf.
Reduce Thatch Layer: A Step-by-Step Approach
To effectively reduce thatch, follow this comprehensive plan.
Step 1: Assess Your Thatch Problem
- Check for the thatch layer thickness using a spade or trowel. If it’s over 0.5 inches, it needs attention.
Step 2: Choose Your Dethatching Method
- Light Thatch: Manual dethatching rake.
- Moderate Thatch/Medium Lawn: Electric dethatcher or a walk-behind power rake.
- Heavy Thatch/Large Lawn: Gas-powered power rake or verticutter, or hire a professional.
Step 3: Prepare Your Lawn
- Mow Low: Cut your grass to 1-1.5 inches.
- Dry Conditions: Ensure the lawn is dry for best results and to prevent clumping.
- Clear Debris: Remove any rocks, toys, or large debris that could damage the dethatching equipment.
Step 4: Dethatch or Power Rake
- Start Conservatively: Begin with a shallower setting. You can always go deeper if needed.
- Work in Passes: Go in one direction, then cross-hatch in the other direction for thorough removal.
- Collect the Thatch: Use a sturdy rake or a vacuum attachment to gather all the loosened material.
Step 5: Aerate (Optional but Recommended)
- If you haven’t aerated recently, or if the soil is compacted, core aerate after dethatching. This helps open up the soil and speeds up decomposition.
Step 6: Overseed (If Necessary)
- If your lawn looks thin or has bare patches after dethatching, overseed to fill in the gaps and create a denser turf.
Step 7: Clean Up and Fertilize
- Rake up all the remaining thatch and debris.
- Apply a balanced fertilizer to help your lawn recover and promote new growth.
Step 8: Water Properly
- Water deeply to help the grass recover and settle the soil.
Step 9: Follow Up with Maintenance
- Continue with good mowing, watering, and fertilization practices to prevent future thatch buildup.
Frequently Asked Questions (FAQ) About Lawn Thatch
Here are some common questions about dealing with thatch:
Q1: How often should I dethatch my lawn?
A: The frequency depends on your grass type, soil conditions, and how well you manage your lawn. Generally, lawns with cool-season grasses may need dethatching every 1-2 years, while warm-season grasses might require it every 2-3 years or if thatch buildup exceeds 0.5 inches. Regular aeration can often extend the time between dethatching.
Q2: Can I dethatch my lawn when it’s wet?
A: It’s best to dethatch when the lawn is dry. Dethatching a wet lawn can be messy, cause the thatch to clump and stick, and potentially damage the grass roots.
Q3: Is dethatching bad for my grass?
A: Dethatching can stress grass, especially if done too aggressively or at the wrong time. However, when done properly during the active growing season, it is beneficial. The temporary stress is outweighed by the long-term health improvements.
Q4: What is the difference between dethatching and aerating?
A: Dethatching (using a power rake or verticutter) mechanically removes the layer of dead organic matter. Aerating (core or spike) creates holes in the soil to improve air, water, and nutrient penetration. They are complementary processes, and often done together for best results.
Q5: Can I just leave a thin layer of thatch?
A: Yes, a thin layer of thatch (less than 0.5 inches) is beneficial. It acts as a natural mulch, insulating the soil and conserving moisture. It’s only when the layer becomes too thick that it causes problems.
Q6: When is the best time of year to dethatch?
A: The best time to dethatch is during your lawn’s active growing season. For cool-season grasses (like fescues, bluegrasses, and ryegrass), this is typically spring or fall. For warm-season grasses (like Bermuda, Zoysia, and St. Augustine), it’s late spring or early summer. Avoid dethatching when the grass is dormant or under heat or drought stress.
Q7: What happens if I don’t dethatch my lawn?
A: If your thatch layer becomes too thick, your lawn can suffer from poor drainage, reduced air circulation, an increased risk of disease and pests, and a weakened root system, making it more susceptible to drought and heat damage.
By following this comprehensive guide, you’ll be well-equipped to tackle thatch and maintain a healthy, beautiful lawn. Remember that consistent care and early intervention are key to managing thatch effectively.